This blog post is a continuation of my series for those who have already started their Hyper-V journey and discovered the great benefits that Hyper-V technology brings to companies and system admin. I will now describe the first steps of Hyper-V deployment, the initial configuration and how to launch your first virtual machine (VM) there.
Hyper-V deployment
For demonstration purposes, I will be using Windows Server 2016 because it’s the newest OS and everyone is likely to be using it at some point. That said, this process is still very similar to the process using previous versions of Windows Servers OS.
First of all, it’s not recommended that you install anything on the server other than the Hyper-V role. Running applications and services not only increase the security, patching and maintenance footprint, but this practice also uses precious CPU/RAM resources from VMs, which could result in reduced VM performance.
The deployment process is quite simple:
- Open Server Manager, navigate to manage pane and select Add Roles and Features.
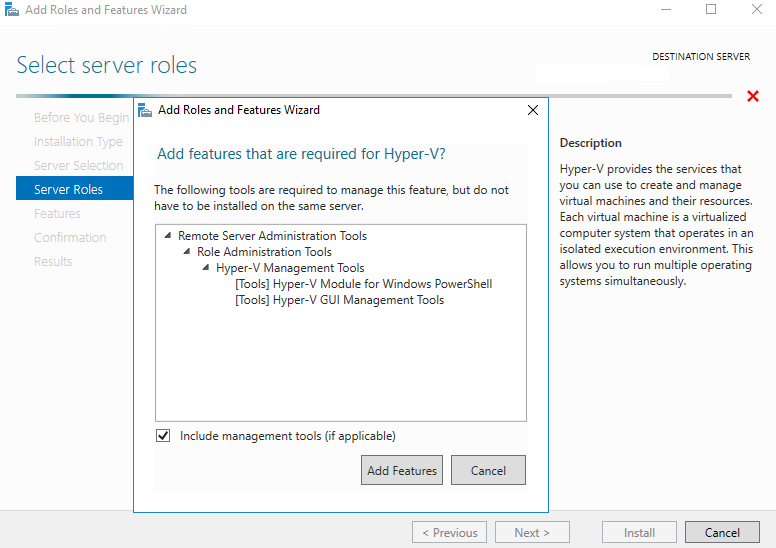
- Select local role, local server and Hyper-V role when prompted. Confirm the installation of additional tools for remote server administration.
- Select which physical NIC(s) you’d like to set up for the Hyper-V VMs, and then choose the default location for your Hyper-V VM files.
- Confirm the installation and wait until it finishes.
- Restart the server.
NOTE: The PowerShell cmdlets for Hyper-V role activation is Install-WindowsFeature –Name Hyper-V -ComputerName <computer_name> -IncludeManagementTools -Restart
The reboot may take a bit of time, but when the server has restarted, you’ll notice that there are new services and components installed. The initial configuration comes next.
HINT: If you’re comfortable with the command line, PowerShell and server management without GUI, then take a look at Hyper-V Core installation.
Hyper-V initial configuration
Once everything is ready, go ahead and open the Hyper-V Manager application, which will soon become your best friend for a very long time! Hyper-V Manager has a pretty straightforward interface that can easily be learned. Before you create the first VM, check the settings and virtual switches. The most important information at this point is in the right pane.
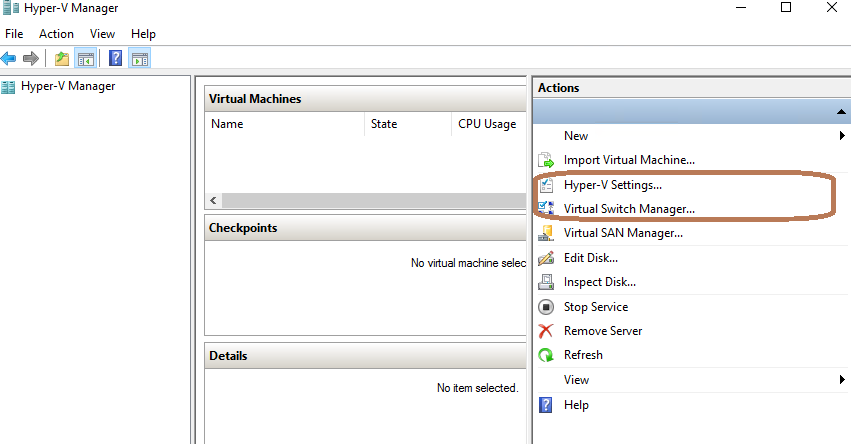
Wonder what you can do in the Hyper-V settings? Several things. I recommend that you evaluate the default location for the VM and virtual disks, because it might be more convenient to use a custom location. If you plan to set up a few Hyper-V servers, you might want to enable functionality for VM live migrations and for the Hyper-V replica server.
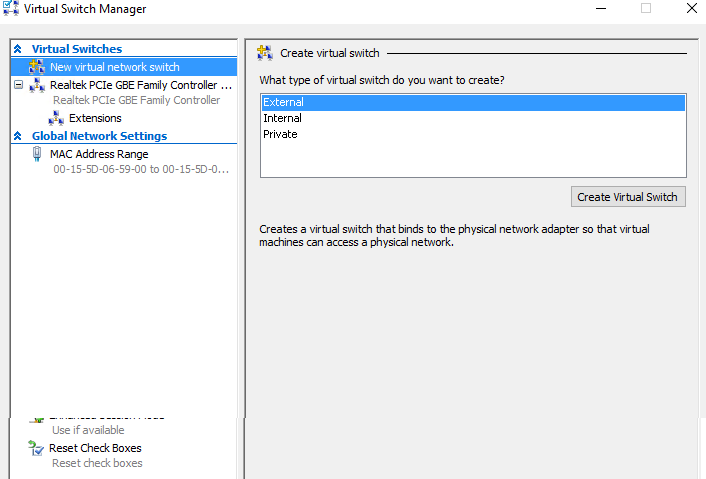
Virtual Switch Manager allows you to configure virtual networking for your future VMs based on your preferred connectivity type. Even though I already described this concept in detail earlier, here’s a short recap:
There are three types of virtual switches available: External, Internal and Private. While the External will give your VMs unrestricted access to the physical network via the physical NIC, both the Internal and Private switches will be used for isolated lab purposes. VMs connected to an Internal virtual switch will see each other and the hypervisor itself, while VMs connected to a Private switch will only see each other. That setup is very useful for an isolated environment.
You will be able to add and remove switches later according to your needs, so no need to worry about this process right now. You may even want to create a switch of each type and play with it a bit.
Now that the settings are applied, let’s move on to the most exciting process: VM creation.
Hyper-V VM creation
To create a VM from the UI, you should navigate to actions and select New virtual machine.
The Virtual Machine creation wizard involves a few steps where you’ll want to:
- Specify the VM name
- Define the amount of physical resources from a host that it can take
- Specify VM generation
- Select the network interface
- Attach a virtual disk to a VM.
If you are unsure, don’t be afraid to skip steps, because everything except the VM generation can be post-configured. You can specify an .iso image with the OS installer or physical CD/DVD drive (for generation 1 VM), or also specify it later.

HINT: Provision hosts resources carefully and use a utility such as free Veeam Task Manager for Hyper-V, which allows for full visibility to keep the situation under control.

Now, you can start a VM, install a guest OS and enjoy the beauty of virtualization! Your VM console (right-click on the VM and connect) will be quite useful, at least for the installation process.
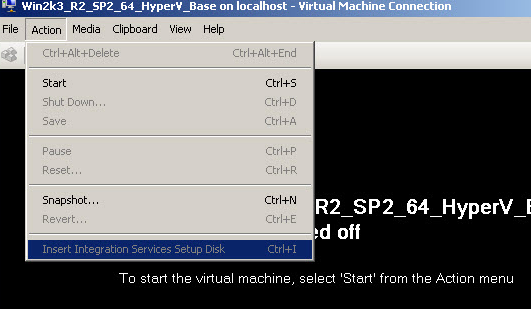
For VMs running on Windows 7 or Windows Server 2008 R2 and older, after the OS deployment you should next install Hyper-V integration services. In the VM connection, click on action and insert Integration Services Setup Disk. Next, go to the guest OS, install the services and reboot the VM. This process will enhance your VM experience.
When using VMs running on Linux or FreeBSD OS, please refer to this article and select the most suitable Linux Integration Services (LIS) package.
NOTE: When starting from Windows Server 2016 Technical Preview versions, the integration services .iso disk is no longer a part of the host OS, so integration services will need to be deployed via Windows Update functionality of the guest OS.
Mastering Hyper-V: What’s next?
Congrats! You have just successfully completed the first steps of your Hyper-V journey! Your next steps include learning Hyper-V-specific features such as dynamic memory, Hyper-V checkpoints and Hyper-V native replication, as well as getting hands-on experience while running VMs and troubleshooting issues. And don’t worry, I will be there to walk you through this entire process. Stay tuned!
See Also:
