From time to time, we need to test something in our infrastructure. Production is not good idea for this, so we build a test environment. Sometimes, such tests may require changes in the hypervisor, which we want to avoid in the production. In such cases, we can work on dedicated test hardware or we can virtualize. Virtualization nesting can be helpful for development, getting familiar with new technologies, new product versions or learning purposes where we can easily simulate our production environment. Recently, Microsoft released Windows Server 2016 with a lot of cool stuff around virtualization like Nano Server, Storage Spaces Direct, Shielded VMs and many, many more. If you want to test these new features, you can virtualize it.
In this blog post, I’ll present how you can build a test environment with Hyper-V working as a VM. There are several ways you can achieve this and I’ll cover few of them. If you are using Windows 10, it’s the easiest option. You just need to enable built-in Hyper-V on your laptop/desktop. As most modern laptops have SSD disks and lots of memory, VMs will work very efficiently on it. Windows 10 Anniversary Update has the same Hyper-V as Windows Server 2016, so you can enable Hyper-V nesting inside Windows 10 in the same way as in WS2016.
Before we start, you should remember to enable CPU virtualization features in BIOS (INTEL VT-x or AMD-V). Also, remember that nesting hypervisors will influence your laptop performance, so if it’s possible, please put that VM on an SSD disk.
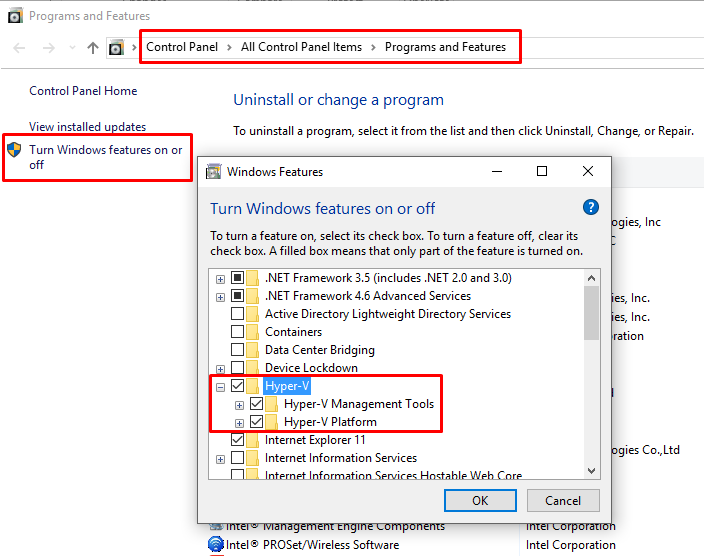
To enable Hyper-V on Windows 10, you should go to Control Panel -> Programs and Features -> Turn Windows features on or off. There, you can find the option to turn Hyper-V on.
Hyper-V on Hyper-V
Yes, it’s not a mistake. Starting from Windows Server 2016/Windows 10, you can nest Hyper-V inside another Hyper-V server without any hacks.
Here are the simple steps:
- Create a VM for nested Hyper-V.
Note: The VM that hosts our Hyper-V should have static memory configured.
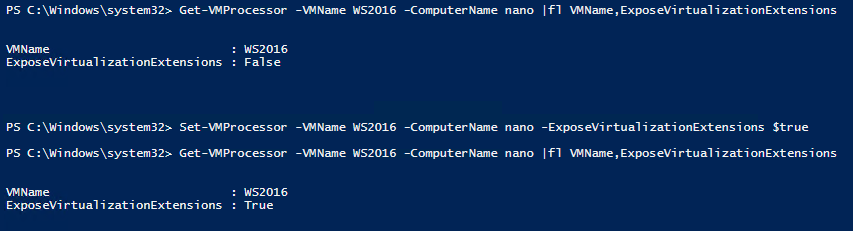
- Run PowerShell command to enable CPU extension virtualization where VMName parameter points to our nested Hyper-V VM. ComputerName points to our host with Hyper-V, and since I’m doing this on the remote Nano Server, I need to specify the server. If you are running this locally, you can skip this parameter. There is no Graphical User Interface (GUI) for that.
Set-VMProcessor -VMName WS2016 -ComputerName Nano - ExposeVirtualizationExtensions $true
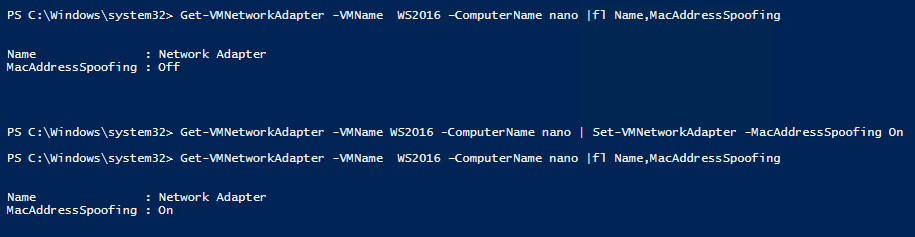
- Enable MAC address spoofing to let VMs on that nested Hyper-V communicate with the rest of the network.
You can enable this from PowerShell or GUI. To check if MAC address spoofing is enabled, run the following command (parameter VMName is to specify a VM where we will enable nested Hyper-V, and ComputerName is for host name):
Get-VMNetworkAdapter -VMName WS2016 –ComputerName Nano |fl Name,MacAddressSpoofing
If this is disabled, you can enable it by:
Get-VMNetworkAdapter -VMName WS2016 -ComputerName Nano | Set-VMNetworkAdapter -MacAddressSpoofing On
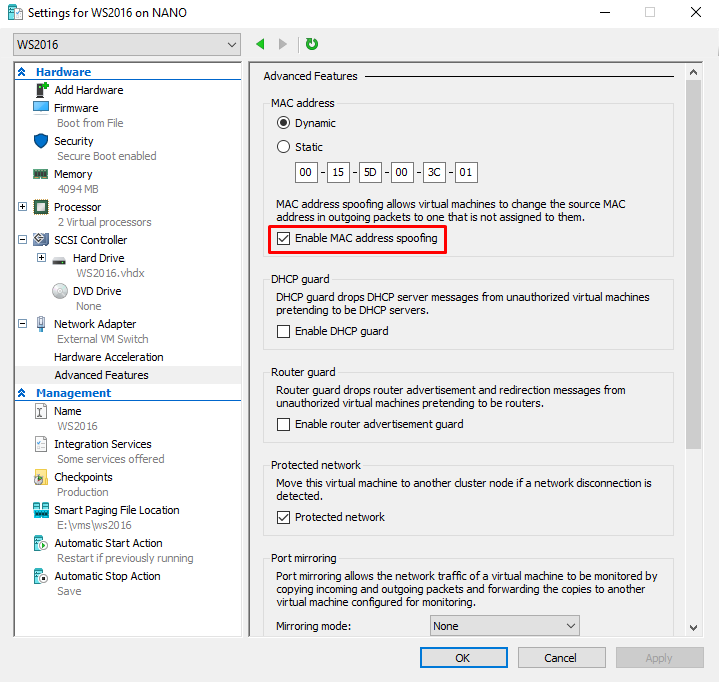
To run this from GUI, you should go to VM Settings à Network Adapter à Advanced Features (see the screen below).
- Now you can install Hyper-V 2016 inside such a VM.
If you already have VMware Workstation/Fusion or ESXi, you can also use it to run Hyper-V as one of the VMs. Below you can find steps to deploy Hyper-V as a VM inside VMware environment.
Hyper-V on VMware Workstation
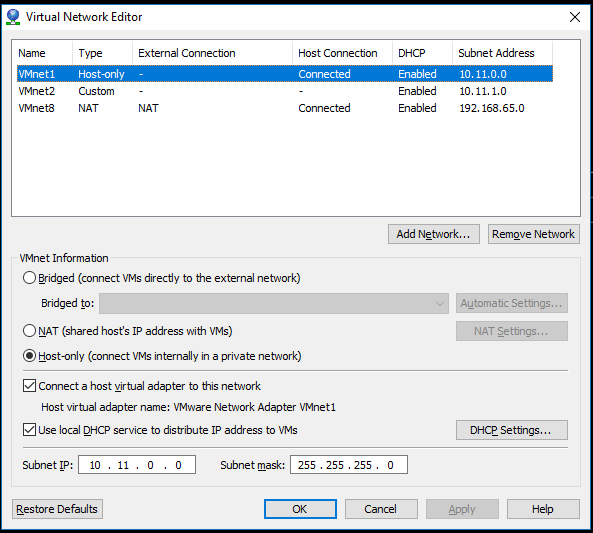
After installing VMware Workstation, you should configure the networks to communicate between VMs with hosts and the internet.
I decided to create two virtual networks: Host-only network and network address translation (NAT). Host-only network is for standard use so I can connect to VMs from host and vice versa, but there is no internet there. NAT is for situations where I need internet connectivity inside the VM.
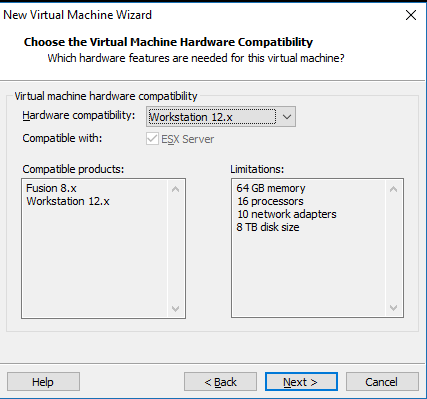
Next step is to create a VM where we will install our Hyper-V.
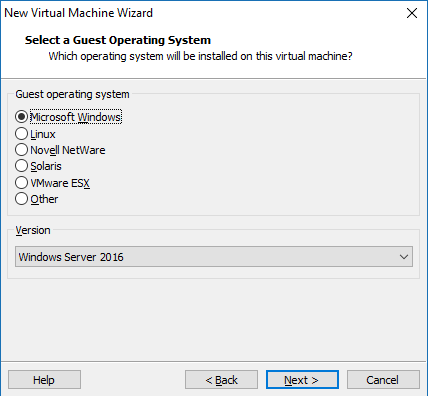
As my Hyper-V will be based on Windows Server 2016, let’s choose it as the guest OS.
On the summary step, there is a Customize Hardware button where you can verify if virtualization engine is set to automatic. This will choose the execution mode based on the guest operating system and the host CPU. You can also manually force the virtual machine execution mode to VT-x/EPT or AMD-RVI.

Now, you can install Windows Server 2016 with Hyper-V enabled inside. Optionally, you can also deploy Nano Server here (more information on how to deploy Nano Server can be found here <link to Nano blog series>).
Hyper-V on ESXi
If you decide to use VMware ESXi instead VMware Workstation, the steps are very similar.
Below are the settings for ESXi 6.5:
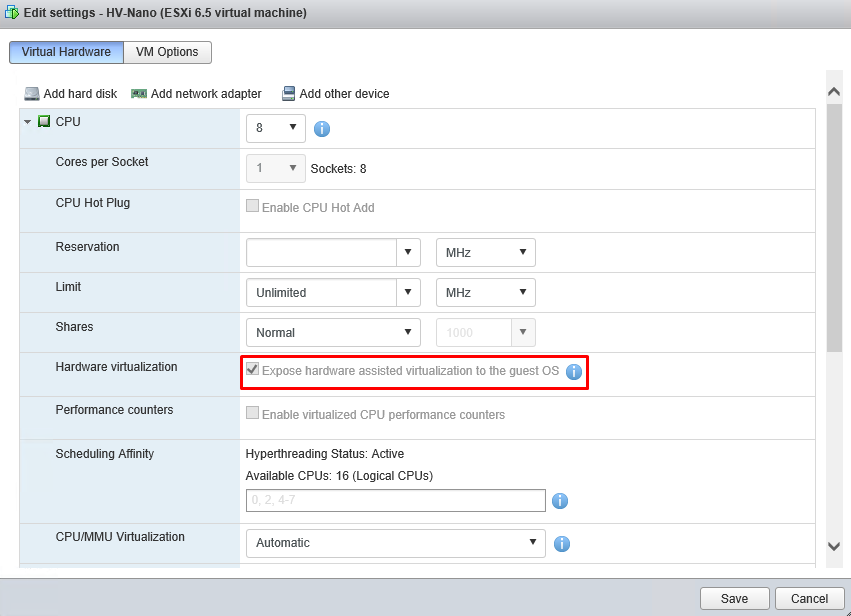
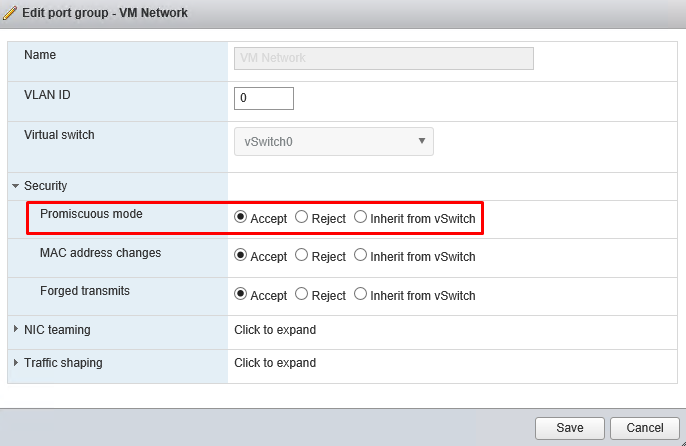
In addition to hardware virtualization setting for CPU, you should remember to modify promiscuous mode in network switch settings which will be used by our Hyper-V. This will allow for outbound traffic from a VM on that nested Hyper-V.
As a result, you will have Hyper-V inside another hypervisor (another Hyper-V, VMware Workstation/Fusion or VMware ESXi).
